Installation Guide
Prerequisites
- Blender 2.93 or later
- Aseprite installed on your system
Installation Steps
1. Download the Add-on
Download the latest aseprite-importer.zip from the Releases page.
2. Install in Blender
- Open Blender
- Go to
Edit > Preferences(orBlender > Preferenceson macOS) - Select the
Add-onstab - Click the
Install...button at the top right - Navigate to the downloaded
aseprite-importer.zipfile - Click
Install Add-on - Enable the add-on by checking the checkbox next to "Import-Export: Aseprite Importer"
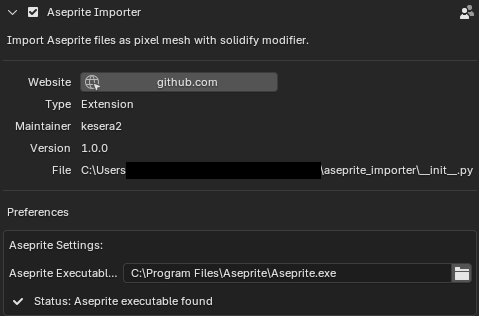
3. Configure Aseprite Path
The add-on will automatically detect your Aseprite installation on first use. To verify or change the path:
In the Add-ons preferences, expand "Aseprite Importer"
Check the Status indicator:
- ✓ Aseprite executable found: The path is correctly configured
- ✗ Aseprite executable not found: You need to set the correct path
If needed, manually set the Aseprite Executable Path:
- Windows:
C:\Program Files\Aseprite\Aseprite.exe(default) orC:\Program Files (x86)\Steam\steamapps\common\Aseprite\Aseprite.exe(Steam) - macOS:
/Applications/Aseprite.app/Contents/MacOS/aseprite - Linux:
/usr/bin/asepriteor~/.steam/steam/steamapps/common/Aseprite/aseprite(Steam)
- Windows:
Auto-Detection
The add-on automatically searches common installation locations. If Aseprite is installed in a non-standard location, you'll need to set the path manually.
Verification
To verify the installation:
- Go to
File > Import - You should see "Aseprite (.aseprite)" in the import menu
Troubleshooting
"Aseprite not found" Error
If you get this error:
- Check the Status indicator in Add-on preferences
- If the status shows "not found", verify that Aseprite is installed
- Check the expected locations listed in the preferences panel
- On macOS/Linux, ensure the executable has proper permissions
Add-on Not Appearing
- Make sure you enabled the add-on (checkbox)
- Try restarting Blender
- Check Blender's console for error messages