Usage Guide
Basic Usage
Importing an Aseprite File
- Open Blender
- Go to
File > Import > Aseprite (.aseprite) - Navigate to your
.asepritefile - Configure import options in the sidebar (optional):
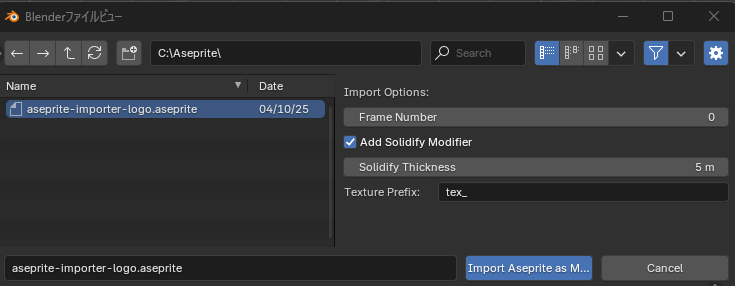
- Frame Number: Which frame to import from multi-frame files (default: 0)
- Add Solidify Modifier: Automatically add Solidify modifier (default: enabled)
- Solidify Thickness: Thickness of the 3D depth in meters (default: 0.1m)
- Texture Prefix: Prefix for exported texture files (default:
tex_)
- Click
Import Aseprite as Mesh - The mesh will be created at the world origin with texture applied
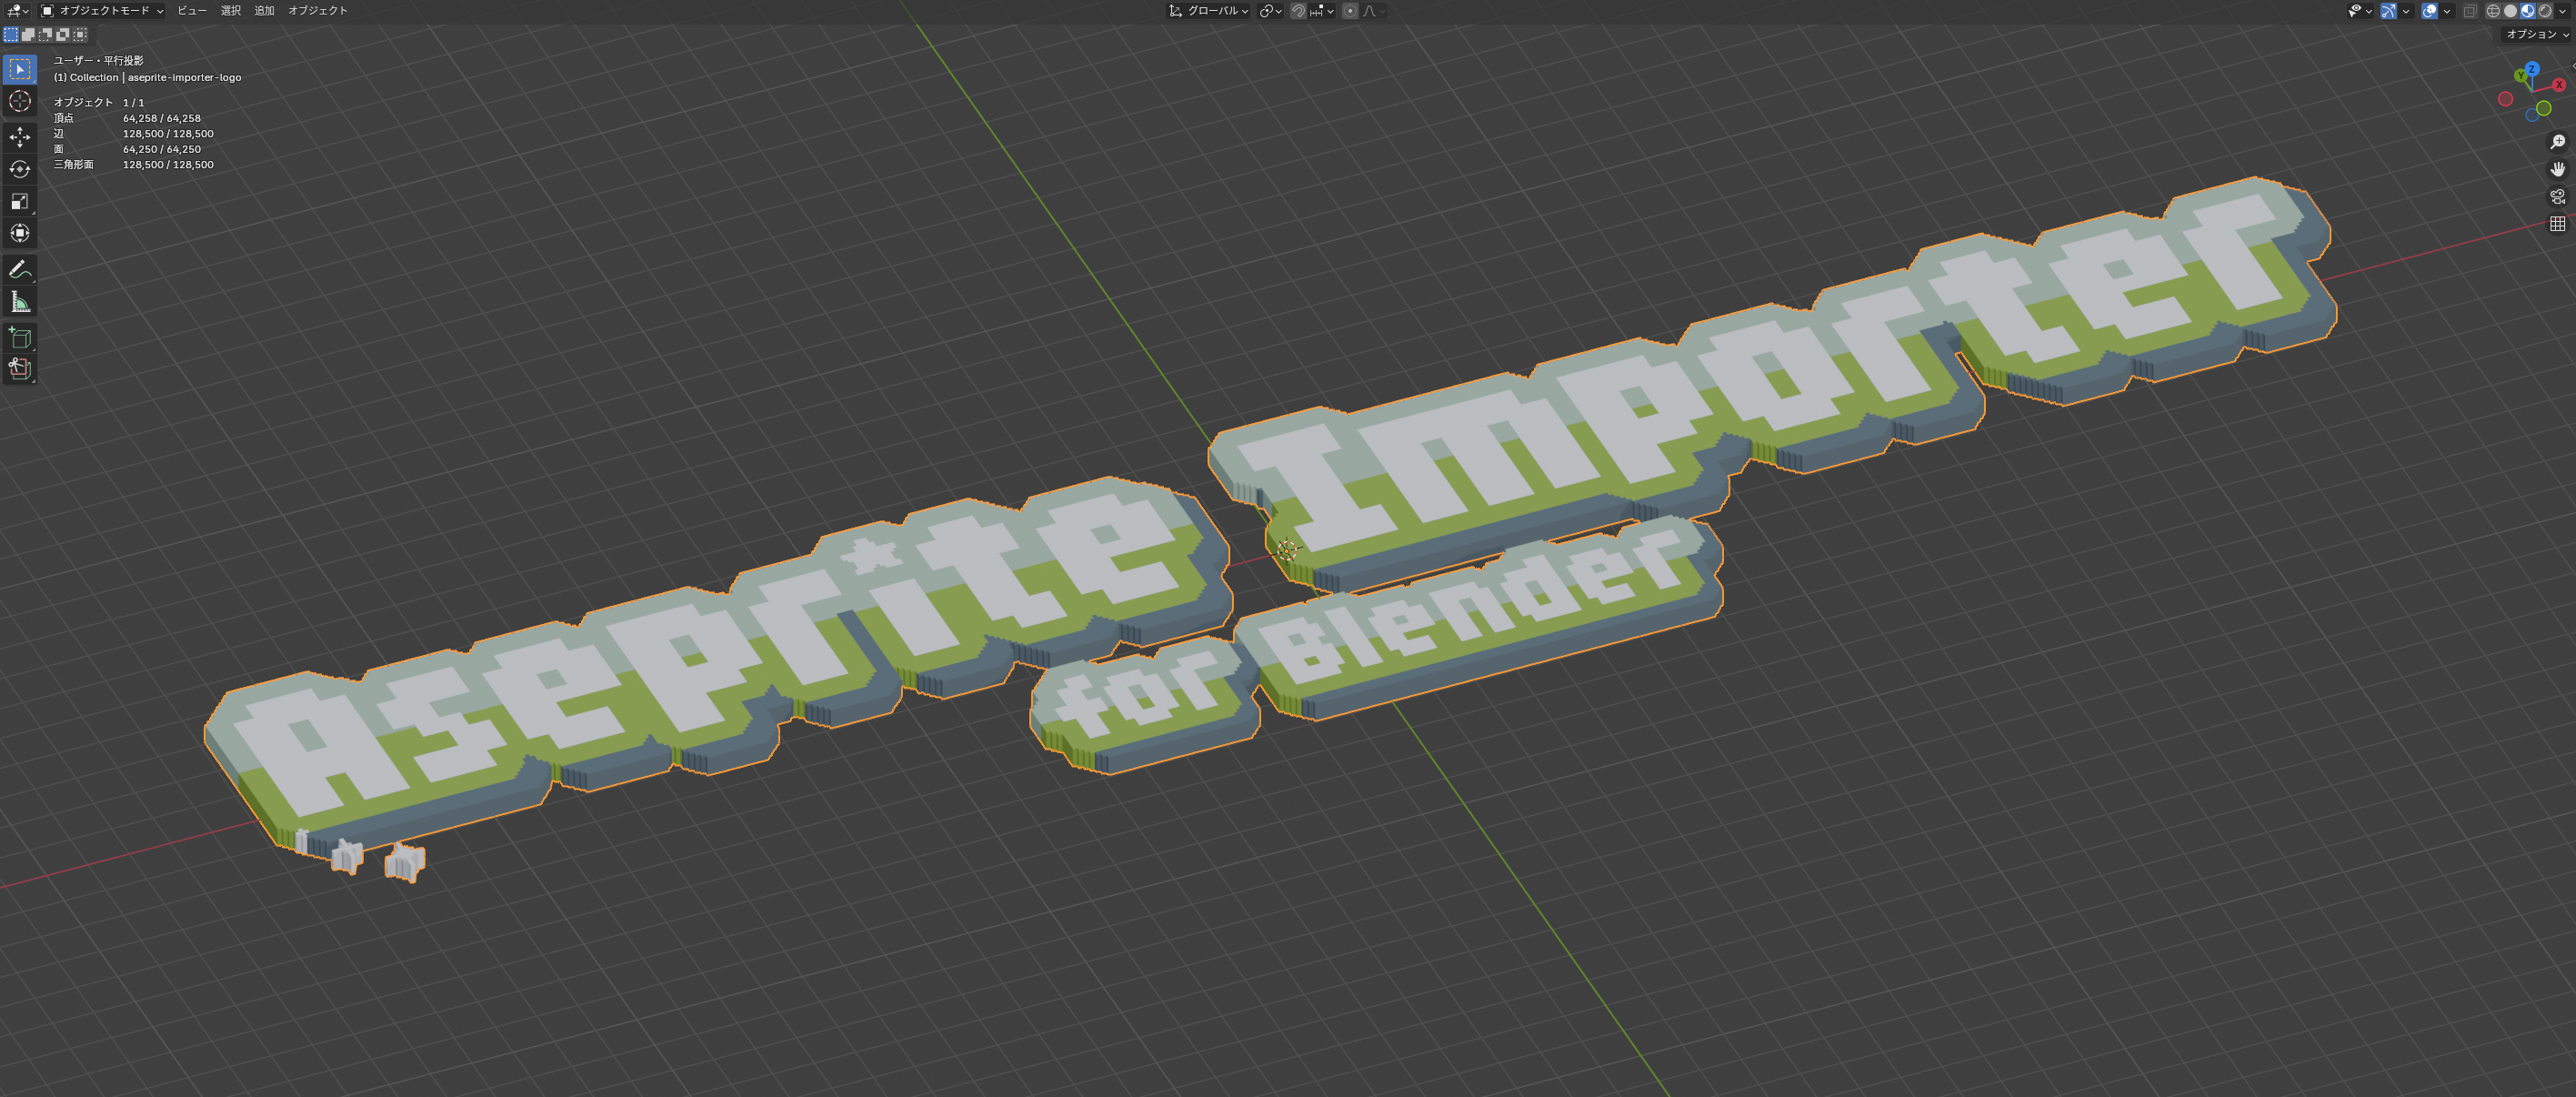 Example: Imported Aseprite file as 3D mesh with Solidify modifier in Material Preview mode
What Gets Created
When you import an Aseprite file, the add-on automatically:
- Converts pixels to 3D mesh: Each non-transparent pixel becomes a quad face
- Applies UV mapping: Pixel-perfect UV coordinates centered on each pixel
- Creates material: Principled BSDF with the texture set to "Closest" interpolation
- Adds Solidify modifier (if enabled): Gives 3D thickness to the flat mesh
- Sets alpha blending: Material uses "Clip" blend mode for transparency
Understanding the Result
Mesh Structure
- Each visible pixel becomes a 1x1 unit quad
- Transparent pixels are excluded
- Duplicate vertices are merged automatically
- Origin is set to center of mass
Solidify Modifier
If enabled in the import dialog, the Solidify modifier:
- Thickness: Default 0.1 units (configurable in import dialog, adjustable after import in modifier panel)
- Offset: 1.0 (extrudes outward)
- Rim: Enabled (creates side faces)
You can modify these settings after import in the Modifiers panel.
Texture
The texture is temporarily exported as PNG in Blender's temp directory with the prefix specified in the import dialog (default: tex_).
Tips and Tricks
Scaling
The imported mesh uses 1 Blender unit per pixel. To scale:
- Select the object
- Press
Sto scale - Enter desired scale factor
Editing the Mesh
After import, you can:
- Modify the Solidify thickness in the Modifiers panel
- Edit UVs if needed
- Add additional modifiers
- Edit the mesh in Edit mode
Texture Interpolation
The texture uses "Closest" interpolation by default to maintain pixel-perfect appearance. To change:
- Go to Shader Editor
- Select the Image Texture node
- Change Interpolation setting
Re-importing
If you update your Aseprite file:
- Simply re-import the file
- A new object will be created
- Delete the old object if needed
Common Workflows
Game Asset Creation
- Import Aseprite sprite
- Adjust Solidify thickness for desired depth
- Add Array modifier for patterns
- Export as FBX/GLTF for game engine
Animation Setup
- Import multiple frames as separate files
- Use as keyframes for stop-motion style animation
- Or use Aseprite's layer export and import each as separate object
Rendering
- Set up lighting for pixel art (avoid soft shadows)
- Use Eevee or Cycles
- Disable anti-aliasing for crisp pixel edges
- Render at multiples of native resolution (2x, 3x, 4x)